
.png)
Welcome back to my blog, i hope you are all doing great!
When I started to tell people the plans for my hair, almost everyone told me not to do it. I was told that DIY highlighting is risky business and that even pro hair colourists do not do their own highlights. Wellllll, as a student I don't really have £150 just laying around to spend on getting my hair done. I need that money for important things like food etc. So going to a salon wasn't really an option for me.
Now that you've seen the process and what the finished hair looks like, here's how mine turned out. As my hair is already quite light i used a cream bleach by ColourFreedom and left it on my hair for about 45 minutes. I wanted my hair to look natural and as though it hadn't been dyed so if you do want a more dramatic effect then i suggest leaving the bleach on for longer (the maximum time is 90 minutes). ColourFreedom is great because it contains no ammonia and is made with natural ingredients unlike other bleaches, with means it doesn't damage your hair as much as some of the other brands do.


I really hope you enjoyed this post, let me know if you'e ever had any DIY hair disasters or if you think you want to try this out! I love reading your comments and hearing your guys opinions.
Have a wonderful day!
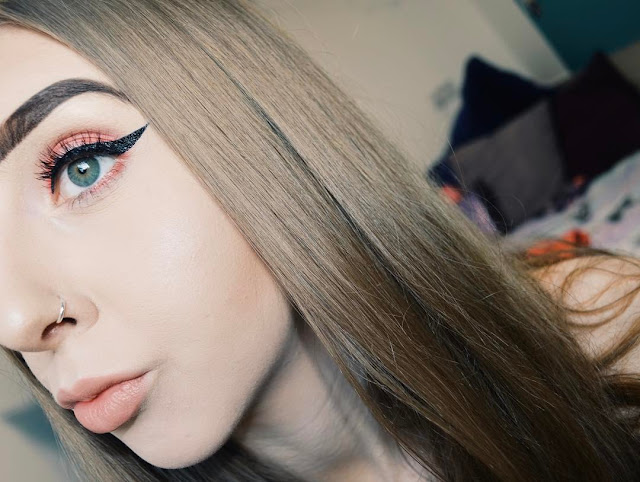
Now, if you've got me on Snapchat then you might have seen that yesterday i posted a few photos of my hair dying process/highlighting session. I've wanted to change the colour of my hair for quite a while now and for the past 3 and a half years i've kind let my hair do its thing and allow my natural colour to grow out. My natural colour is a sort of dark blonde/light brown shade and isn't all that exciting, see image below, so i decided to switch it up a little to make it a bit blonder ready for the summer.

When I started to tell people the plans for my hair, almost everyone told me not to do it. I was told that DIY highlighting is risky business and that even pro hair colourists do not do their own highlights. Wellllll, as a student I don't really have £150 just laying around to spend on getting my hair done. I need that money for important things like food etc. So going to a salon wasn't really an option for me.
Now let me tell you this. If you want thick highlights that go all the way to the roots of your hair then these tips are 100% not for you and I can't tell you how this process works. I did a sort of balayage style of highlights where i only took the dye halfway up the mid lengths of my hair (which really is super easy).
For the look I was going for I followed a tutorial by Ashley Brooke, who is an absolutely gorgeous YouTuber that you should definitely check out! I'll pop the video below so you can see how I achieved my look and so you have a better understanding of the process.
Now that you've seen the process and what the finished hair looks like, here's how mine turned out. As my hair is already quite light i used a cream bleach by ColourFreedom and left it on my hair for about 45 minutes. I wanted my hair to look natural and as though it hadn't been dyed so if you do want a more dramatic effect then i suggest leaving the bleach on for longer (the maximum time is 90 minutes). ColourFreedom is great because it contains no ammonia and is made with natural ingredients unlike other bleaches, with means it doesn't damage your hair as much as some of the other brands do.

Apologies for the rubbish Snapchat quality, but it's the only photo i currently have of my finished hair. All in all though, i am really pleased with how it turned out. Because i started with the underneath and gradually worked my way to the top layers of my hair, there are different tones of blonde where the bleach was on some parts longer than others which i think looks really pretty. Let me know what you think!


I really hope you enjoyed this post, let me know if you'e ever had any DIY hair disasters or if you think you want to try this out! I love reading your comments and hearing your guys opinions.
Have a wonderful day!


No comments:
Post a Comment